Nginx在windows環境下的安裝與簡單配置
一. 下載並安裝Nginx
去 Nginx官網下載
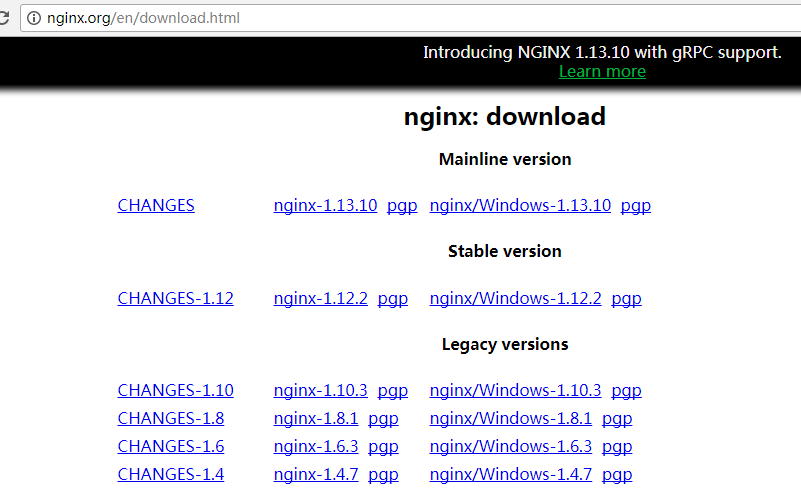
我這裏選取 nginx/Windows-1.10.3版本,下載後解壓出來即可,解壓出來的路徑不能含有中文
我解壓後將其放置的路徑如下

二、開始運行
在當前目錄下按住shift+鼠標右鍵,選擇“在此處打開命令窗口”,然後輸入start nginx

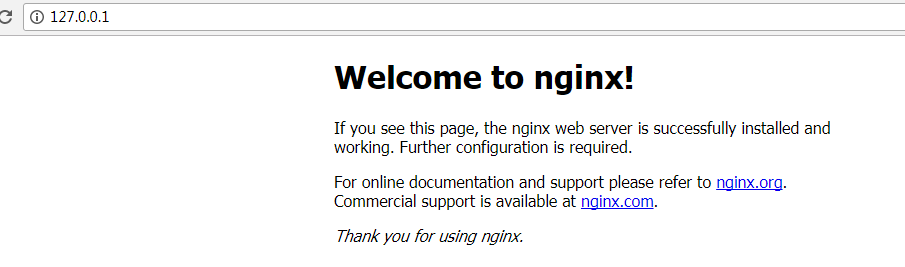
此時,就可以進入瀏覽器輸入訪問地址,http://127.0.0.1/或者http://localhost/即可訪問
三、配置文檔講解
核心配置文檔就是nginx.conf,該文檔位於conf目錄下,大部分情況下我們就是修改該文檔的配置
該文檔的原始配置如下:
#user  nobody;
worker_processes  1;
#error_log  logs/error.log;
#error_log  logs/error.log  notice;
#error_log  logs/error.log  info;
#pid        logs/nginx.pid;
events {
    worker_connections  1024;
}
http {
    include       mime.types;
    default_type  application/octet-stream;
    #log_format  main  '$remote_addr - $remote_user [$time_local] "$request" '
    #                  '$status $body_bytes_sent "$http_referer" '
    #                  '"$http_user_agent" "$http_x_forwarded_for"';
    #access_log  logs/access.log  main;
    sendfile        on;
    #tcp_nopush     on;
    #keepalive_timeout  0;
    keepalive_timeout  65;
    #gzip  on;
    server {
        listen       80;
        server_name  localhost;
        #charset koi8-r;
        #access_log  logs/host.access.log  main;
        location / {
            root   html;
            index  index.html index.htm;
        }
        #error_page  404              /404.html;
        # redirect server error pages to the static page /50x.html
        #
        error_page   500 502 503 504  /50x.html;
        location = /50x.html {
            root   html;
        }
        # proxy the PHP scripts to Apache listening on 127.0.0.1:80
        #
        #location ~ \.php$ {
        #    proxy_pass   http://127.0.0.1;
        #}
        # pass the PHP scripts to FastCGI server listening on 127.0.0.1:9000
        #
        #location ~ \.php$ {
        #    root           html;
        #    fastcgi_pass   127.0.0.1:9000;
        #    fastcgi_index  index.php;
        #    fastcgi_param  SCRIPT_FILENAME  /scripts$fastcgi_script_name;
        #    include        fastcgi_params;
        #}
        # deny access to .htaccess files, if Apache's document root
        # concurs with nginx's one
        #
        #location ~ /\.ht {
        #    deny  all;
        #}
    }
    # another virtual host using mix of IP-, name-, and port-based configuration
    #
    #server {
    #    listen       8000;
    #    listen       somename:8080;
    #    server_name  somename  alias  another.alias;
    #    location / {
    #        root   html;
    #        index  index.html index.htm;
    #    }
    #}
    # HTTPS server
    #
    #server {
    #    listen       443 ssl;
    #    server_name  localhost;
    #    ssl_certificate      cert.pem;
    #    ssl_certificate_key  cert.key;
    #    ssl_session_cache    shared:SSL:1m;
    #    ssl_session_timeout  5m;
    #    ssl_ciphers  HIGH:!aNULL:!MD5;
    #    ssl_prefer_server_ciphers  on;
    #    location / {
    #        root   html;
    #        index  index.html index.htm;
    #    }
    #}
}
其中#代表註釋
nginx我們最主要的作用是拿來做反向代理和負載均衡,這個我後面會着重講解。同時它還是一個web服務器,與我們常用的Apache、tomcat、IIS一樣,也可以用來託管web服務。
本章先暫時介紹下該配置文檔中的幾個重要參數,後面會對nginx部署php和Python項目再進行着重講解,至於java的項目通常是tomcat+nginx同時進行配置,nginx用來做負載均衡和處理靜態頁。
1、定義Nginx運行的用户和用户組
2、nginx進程數,建議設置為等於CPU總核心數
3、全局錯誤日誌定義類型,[ debug | info | notice | warn | error | crit ]
#error_log logs/error.log notice;
#error_log logs/error.log info;
4、進程文檔
5、工作模式與連接數上限:worker_connections是單個後台worker process進程的最大併發鏈接數,併發總數是 worker_processes 和 worker_connections 的乘積, 即 max_clients = worker_processes * worker_connections
events {
worker_connections 1024;
}
6、http下的一些配置及其意義
include mime.types; #文檔擴展名與文檔類型映射表
default_type application/octet-stream; #默認文檔類型
sendfile on; #開啟高效文檔傳輸模式,sendfile指令指定nginx是否調用sendfile函數來 輸出文檔,對於普通應用設為 on,如果用來進行下載等應用磁盤IO重負載應用,可設置 為off,以平衡磁盤與網絡I/O處理速度,降低系統的負載。注意:如果圖片顯示不正常 把這個改成off。
autoindex on; #開啟目錄列表訪問,合適下載服務器,默認關閉。
tcp_nopush on; #防止網絡阻塞
tcp_nodelay on; #防止網絡阻塞
keepalive_timeout 120; #長連接超時時間,單位是秒
gzip on; #開啟gzip壓縮輸出
7、server虛擬主機的相關配置
我們平時配置各類服務器,配置最多的就是這些地方了
比如:
http{
 #虛擬主機1
 server{
  listen       80;   #監聽端口,基於IP配置的時候變更此處,比如192.168.1.100:8080;
  server_name  www.xdw.com;  #主機域名,實際項目發佈的話,填公網上的域名,本地部署的話,可以在C:\Windows\System32\drivers\etc\hosts文檔中添加IP和域名的映射
  location / {  #映射解析,/代表根路徑,此處解析還有正則表達式的解析方式,具體請參考http://tengine.taobao.org/nginx_docs/cn/docs/http/ngx_http_core_module.html#location
     root   E:/xdw/0221;   #工程所在路徑
     index  index.html index.htm;  #首頁(默認頁)
  }
 }
 #虛擬主機2,可以同時配置多個虛擬主機
 server{
  listen       8080;
  server_name  localhost;
  location / {
     root   D:/xiangmu/txym_web;
     index  index.html index.htm;
  }
 }
}
看到這個虛擬主機的配置,相信配置過tomcat或者Apache的人都很熟悉的感覺。此篇就到此結束,下面還會更新linux下的配置,php和python項目的部署,反向代理和負載均衡,配合tomcat部署java項目。
原文出處:Nginx在windows環境下的安裝與簡單配置 - 掃文資訊


 [轉貼]Nginx 在 windows 環境下的安裝與簡單配置 (冷日