茫茫網海中的冷日
         
茫茫網海中的冷日
發生過的事,不可能遺忘,只是想不起來而已!
 恭喜您是本站第 1664630 位訪客!  登入  | 註冊
主選單

Google 自訂搜尋

Goole 廣告

隨機相片
PIMG_00142.jpg

授權條款

使用者登入
使用者名稱:

密碼:


忘了密碼?

現在就註冊!

小企鵝開談 : [轉貼]Let’s Encrypt 免費 SSL/TLS 憑證安裝

發表者 討論內容
冷日
(冷日)
Webmaster
  • 註冊日: 2008/2/19
  • 來自:
  • 發表數: 15766
[轉貼]Let’s Encrypt 免費 SSL/TLS 憑證安裝

Let’s Encrypt免費SSL/TLS憑證安裝

使用HTTPS連線服務,幫網站加密。

2016年12月底,Google發佈消息:

From the end of January with Chrome 56, Chrome will mark HTTP sites that collect passwords or credit cards as non-secure.

網站的全面HTTPS化已經是趨勢,但以往想為網站加入 SSL 加密協定( HTTPS),必須支付一筆費用來申請憑證。現在有個名為 Let’s Encrypt 的數位憑證認證機構推出 免費 SSL/TLS 憑證服務。

Let’s Encrypt


Let’s Encrypt 憑證簽發為每三個月一次,也就是每 90 天必須更新(renew)一次。取得憑證的過程需要進主機安裝代理程式,代理程式就叫做 “letsencrypt”,是 Let’s Encrypt 官方软件 certbot 在 Ubuntu 16.04 上的名字。

在Ubuntu 16.04上安裝 Let’s Encrypt 和創建SSL

1. 安裝 letsencrypt

進入主機更新apt-get後安裝letsencrypt:

sudo apt-get install letsencrypt

2. 取得 SSL 證書

Step1: 開啟網路服務軟體 well-know 功能

執行指令

sudo vim /etc/nginx/sites-available/default

再 server 後面的大括號中寫入資料

location ~ /.well-known {
allow all;
}
}

用 nginx 的預設測試指令查看內容有沒有錯誤

sudo nginx -t
nginx: the configuration file /etc/nginx/nginx.conf syntax is ok
nginx: configuration file /etc/nginx/nginx.conf test is successful

Step2: 重新啟動 nginx

sudo systemctl restart nginx

Step3: 製作 SSL 證書,並使用EMAIL註冊


var/www/html -d www.example.com
# 將/var/www/html換成app的根目錄位置,如果使用Capistrano自動化部署,path爲 /home/deploy/example/current/public;
# 將www.example.com換成自己的網域名稱

途中需輸入信箱,最後同意 Lets Encrypt 使用條款。

完成時會出現類似下面的訊息

/etc/letsencrypt/live/example.com/fullchain.pem. Your cert
will expire on 2017-08-06. To obtain a new version of the
certificate in the future, simply run Let's Encrypt again.
- If you like Let's Encrypt, please consider supporting our work by:
Donating to ISRG / Let's Encrypt:   https://letsencrypt.org/donate
Donating to EFF: https://eff.org/donate-le

表示伺服器的 SSL Key會存到/etc/letsencrypt/live/example.com/這個位置,這個路徑之後會用到。

註:如果失敗超過5次會遭到封鎖 1小時


An unexpected error occurred:
There were too many requests of a given type :: Error creating new authz :: Too many invalid authorizations recently.
Please see the logfiles in /var/log/letsencrypt for more details.
We recently (April 2017) introduced a Failed Validation limit of 5 failures per account, per hostname, per hour. This limit will be higher on staging so you can use staging to debug connectivity problems.

製作安全性更高的 Diffie-Hellman

迪菲-赫爾曼密鑰交換是一種安全協定。它可以讓雙方在完全沒有對方任何預先資訊的條件下通過不安全信道建立起一個金鑰。這個金鑰可以在後續的通訊中作為對稱金鑰來加密通訊內容。

產生一個 2048bit 的 Diffie-Hellman:

sudo openssl dhparam -out /etc/ssl/certs/dhparam.pem 2048

3. 調整 Nginx 的配置,讓網站受到 SSL 保護

Step1: 利用snippets讓Nginx方便載入設定。

在 /etc/nginx/snippets 目錄裡面建立 ssl-example.com.conf 檔案,example.com 換成自己的domain。

sudo vim /etc/nginx/snippets/ssl-example.com.conf

內容貼上:


ssl_certificate /etc/letsencrypt/live/example.com/fullchain.pem;
ssl_certificate_key /etc/letsencrypt/live/example.com/privkey.pem;
# 將example.com換成自己的網域名稱

另外建立一個 ssl-params.conf 規範一些 SSL 的設定:

sudo vim /etc/nginx/snippets/ssl-params.conf

貼上 Cipherli.st 建議的 Nginx 設定,並在最後一行導入2048bit Diffie-Hellman:

https://cipherli.st/
# and https://raymii.org/s/tutorials/Strong_SSL_Security_On_nginx.html

ssl_protocols TLSv1 TLSv1.1 TLSv1.2;
ssl_prefer_server_ciphers on;
ssl_ciphers "EECDH+AESGCM:EDH+AESGCM:AES256+EECDH:AES256+EDH";
ssl_ecdh_curve secp384r1;
ssl_session_cache shared:SSL:10m;
ssl_session_tickets off;
ssl_stapling on;
ssl_stapling_verify on;
resolver 8.8.8.8 8.8.4.4 valid=300s;
resolver_timeout 5s;
add_header Strict-Transport-Security "max-age=63072000; includeSubdomains";
add_header X-Frame-Options DENY;
add_header X-Content-Type-Options nosniff;
ssl_dhparam /etc/ssl/certs/dhparam.pem;

Step2: 修改 Nginx 的設定檔案。

先備份default 檔案

sudo cp /etc/nginx/sites-available/default /etc/nginx/sites-available/default.bak

修改default 檔案:

sudo vim /etc/nginx/sites-available/default

將以下內容加入server{}中:

# SSL configuration
listen 443 ssl http2 default_server;
listen [::]:443 ssl http2 default_server;

include snippets/ssl-example.com.conf; # example.com換成正確檔案名稱
include snippets/ssl-params.conf;

內容是加入Listening Port 443 ,啓用 HTTP/2,以及將剛剛製作的2個檔案載入。接下來修改 nginx 的虛擬主機配置:

sudo vim /etc/nginx/sites-enabled/example.conf

listen 443 ssl http2; 加到檔案中。

$ sudo nginx -t 檢查設定是否正確,正確後重啓服務:

$ sudo systemctl restart nginx

利用 Qualys SSL Labs Report 查看我們網站的安全性是否可以順利拿到 A+ 的成績。

4. 自動更新憑證

letsencrypt 代理程式有提供自動更新的指令:

sudo letsencrypt renew
The following certs are not due for renewal yet:
/etc/letsencrypt/live/platform.loginyo.com/fullchain.pem (skipped)
No renewals were attempted.
# 還不需要更新時,不會執行。

利用crontab自動排程:

  • 更新憑證。
  • 重新加載網頁服務器。

30 2 * * 7 root /usr/bin/letsencrypt renew >> /var/log/le-renew.log
35 2 * * 7 root /bin/systemctl reload nginx

每個禮拜天的晚上2點30分更新憑證,然後2點35分的時候重新加載網頁服務器。

Mixed content 瀏覽器警告

安裝完之後可能會發現網站還是顯示爲不安全,瀏覽器的console會出現
Mixed Content 警告訊息。意思是說你在加密的 HTTPS 的網頁之中,使用到非加密的 HTTP 的資源,這個資源可能是 JavaScript、CSS、圖片或是 iframe (不包括超連結)。

解決方案是將有用到絕對網址 http:// 開頭的資源替換成 HTTPS。

Google Developer 網站的教學: Fixing mixed Content


原文出處:Let’s Encrypt免費SSL/TLS憑證安裝 – Dosmanthus – Medium
冷日
(冷日)
Webmaster
  • 註冊日: 2008/2/19
  • 來自:
  • 發表數: 15766
[轉貼]免費 SSL 安全證書 Let's Encrypt 安裝使用教程(附Nginx/Apache配置)

免費SSL安全證書Let's Encrypt安裝使用教程(附Nginx/Apache配置)

https://www.vpser.net/build/letsencrypt-free-ssl.html

Let's Encrypt是最近很火的一個免費SSL證書發行項目,Let's Encrypt是由ISRG提供的免費免費公益項目,自動化發行證書,但是證書只有90天的有效期。適合個人使用或者臨時使用,不用再忍受自簽發證書不受瀏覽器信賴的提示。前段時間一直是內測,現在已經開放了。本教程安裝不需要停掉當前Web服務(Nginx/Apache),直接生成證書,廢話不多說下面開始:

目前已經更新爲新工具certbot,使用教程: https://www.vpser.net/build/letsencrypt-certbot.html 配置文件和以前一樣。
建議使用git 以後有了新版更新方便,沒安裝的話Debian/Ubuntu:apt-get install git ,CentOS:yum install git-core
git clone https://github.com/letsencrypt/letsencrypt.git
cd letsencrypt

不安裝git的話:wget -c https://github.com/letsencrypt/letsencrypt/archive/master.zip && unzip master.zip && cd letsencrypt-master

LNMP一鍵安裝包都是Nginx/Apache默認支持ssl不需要另外單獨編譯,接下來先以 LNMP一鍵安裝包爲例,LNMP用戶可以直接參考此教程:

執行:mkdir -p /home/wwwroot/域名/.well-known/acme-challenge 創建臨時目錄,當然這個.well-known/acme-challenge前面的目錄要替換爲你自己的網站目錄,根據你自己的實際情況修改。

正式開始生成證書

接下來正式進行證書生成操作:
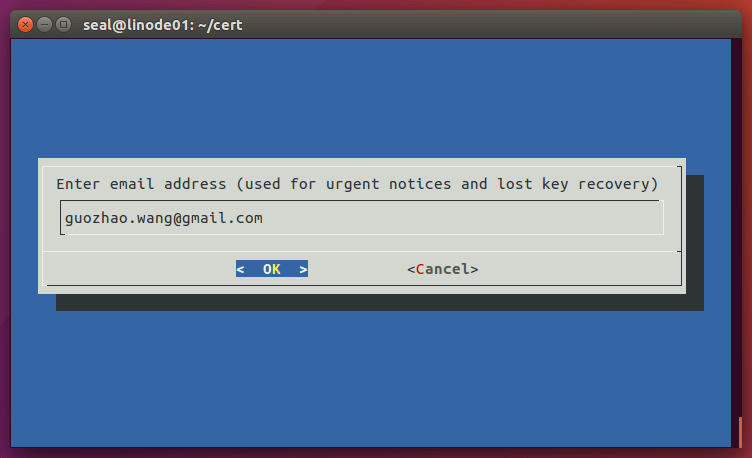
./letsencrypt-auto certonly --email 郵箱 -d 域名 --webroot -w /網站目錄完整路徑 --agree-tos
如果多個域名可以加多個-d 域名,注意替換上面的郵箱、域名和網站目錄,注意這裏的網站目錄完整路徑只是你單純的網站目錄也就是虛擬主機配置文件裏的,如Nginx虛擬主機配置裏的root,Apache虛擬主機配置裏的DocumentRoot。

首先Let's Encrypt會檢測系統安裝一些依賴包,安裝完依賴包會有藍色的讓閱讀TOS的提示,Agree回車 稍等片刻就行了可添加--agree-tos參數屏蔽該窗口。
生成證書後會有如下提示:

IMPORTANT NOTES:
- If you lose your account credentials, you can recover through
e-mails sent to
[email protected]
- Congratulations! Your certificate and chain have been saved at
/etc/letsencrypt/live/www.vpser.net/fullchain.pem. Your cert will
expire on 2016-03-07. To obtain a new version of the certificate in
the future, simply run Let's Encrypt again.
- Your account credentials have been saved in your Let's Encrypt
configuration directory at /etc/letsencrypt. You should make a
secure backup of this folder now. This configuration directory will
also contain certificates and private keys obtained by Let's
Encrypt so making regular backups of this folder is ideal.
- If like Let's Encrypt, please consider supporting our work by:

Donating to ISRG / Let's Encrypt: https://letsencrypt.org/donate
Donating to EFF: https://eff.org/donate-le

Nginx虛擬主機的設置


接下來進行配置Nginx虛擬主機文件,完整配置如下:

ssl_protocols TLSv1 TLSv1.1 TLSv1.2;
ssl_prefer_server_ciphers on;
ssl_session_cache shared:SSL:10m;

include wordpress.conf; #這個是僞靜態根據自己的需求改成其他或刪除
#error_page 404 /404.html;
location ~ [^/]\.php(/|$)
{
# comment try_files $uri =404; to enable pathinfo
try_files $uri =404;
fastcgi_pass unix:/tmp/php-cgi.sock;
fastcgi_index index.php;
include fastcgi.conf; #lnmp 1.0及之前版本替換爲include fcgi.conf;
#include pathinfo.conf;
}

location ~ .*\.(gif|jpg|jpeg|png|bmp|swf)$
{
expires 30d;
}

location ~ .*\.(js|css)?$
{
expires 12h;
}

access_log off;
}

需將上述配置根據自己的實際情況修改後,添加到虛擬主機配置文件最後面。

添加完需要執行:/etc/init.d/nginx reload 重新載入配置使其生效。


開啓後有效期內必須只能https訪問,不確定的話不要開啓。

Apache虛擬主機上的設置

Apache在生成證書後也需要修改一下apache的配置文件 /usr/local/apache/conf/httpd.conf ,查找httpd-ssl將前面的#去掉。

然後再執行:

Apache 2.2如下:
cat >/usr/local/apache/conf/extra/httpd-ssl.conf<<EOF
Listen 443

AddType application/x-x509-ca-cert .crt
AddType application/x-pkcs7-crl .crl

SSLCipherSuite EECDH+CHACHA20:EECDH+CHACHA20-draft:EECDH+AES128:RSA+AES128:EECDH+AES256:RSA+AES256:EECDH+3DES:RSA+3DES:!MD5
SSLProxyCipherSuite EECDH+CHACHA20:EECDH+CHACHA20-draft:EECDH+AES128:RSA+AES128:EECDH+AES256:RSA+AES256:EECDH+3DES:RSA+3DES:!MD5
SSLHonorCipherOrder on

SSLProtocol all -SSLv2 -SSLv3
SSLProxyProtocol all -SSLv2 -SSLv3
SSLPassPhraseDialog builtin

SSLSessionCacheTimeout 300


SSLStrictSNIVHostCheck on
NameVirtualHost *:443
EOF

Apache 2.4如下:

cat >/usr/local/apache/conf/extra/httpd-ssl.conf<<EOF
Listen 443

AddType application/x-x509-ca-cert .crt
AddType application/x-pkcs7-crl .crl

SSLCipherSuite EECDH+CHACHA20:EECDH+CHACHA20-draft:EECDH+AES128:RSA+AES128:EECDH+AES256:RSA+AES256:EECDH+3DES:RSA+3DES:!MD5
SSLProxyCipherSuite EECDH+CHACHA20:EECDH+CHACHA20-draft:EECDH+AES128:RSA+AES128:EECDH+AES256:RSA+AES256:EECDH+3DES:RSA+3DES:!MD5
SSLHonorCipherOrder on

SSLProtocol all -SSLv2 -SSLv3
SSLProxyProtocol all -SSLv2 -SSLv3
SSLPassPhraseDialog builtin

SSLSessionCacheTimeout 300

Mutex sysvsem default

SSLStrictSNIVHostCheck on
EOF

並在對應apache虛擬主機配置文件的 最後</VirtualHost>下面添加上SSL部分的配置文件:


<VirtualHost *:443>
DocumentRoot /home/wwwroot/www.vpser.net #網站目錄
ServerName www.vpser.net:443 #域名
ServerAdmin [email protected] #郵箱
ErrorLog "/home/wwwlogs/www.vpser.net-error_log" #錯誤日誌
CustomLog "/home/wwwlogs/www.vpser.net-access_log" common #訪問日誌
SSLEngine on
SSLCertificateFile /etc/letsencrypt/live/www.vpser.net/fullchain.pem #改一下里面的域名就行
SSLCertificateKeyFile /etc/letsencrypt/live/www.vpser.net/privkey.pem #改一下里面的域名就行
<Directory "/home/wwwroot/www.vpser.net"> #網站目錄
SetOutputFilter DEFLATE
Options FollowSymLinks
AllowOverride All
Order allow,deny
Allow from all
DirectoryIndex index.html index.php
</Directory>
</VirtualHost>


需將上述配置根據自己的實際情況修改後,添加到虛擬主機配置文件最後面。注意要重啓apache使其實現。執行:/etc/init.d/httpd restart 重啓Apache使其生效。

下面說一下可能會遇到的問題:

1、國內DNS服務商可能會不行,目前已知dnspod、cloudxns不行dnspod、cloudxns目前已經可以

Namecheap、Route 53的都可以。

2、Linode福利或IPv6用戶福利

可能目前Linode用戶應該遇到了
An unexpected error occurred:
There were too many requests of a given type :: Error creating new registration :: Too many registrations from this IP
Please see the logfiles in /var/log/letsencrypt for more details.
這個不一定是因爲IP註冊的次數過多,可能是因爲IPv6的事,具體解決方法如下:
執行:sysctl -w net.ipv6.conf.all.disable_ipv6=1 來臨時禁用IPv6
再生成證書後執行:sysctl -w net.ipv6.conf.all.disable_ipv6=0 再來解除禁用IPv6

3、如果啓用了防火牆需要將443端口加入允許規則,一般iptables可以參考:
https://www.vpser.net/security/linux-iptables.html

4、如果LNMP下訪問http://abc.com/.well-known/acme-challenge/**** 這個鏈接403的話是因爲默認LNMP 1.3的虛擬主機裏是禁止.開頭的隱藏文件及目錄的。需要將
location ~ /\.
{
deny all;
}
這段配置刪掉或註釋掉或在這段配置前面加上

location ~ /.well-known {
allow all;
}

以上配置代碼,然後重啓nginx。

證書續期

最後要說的是續期,因爲證書只有90天,所以建議60左右的時候進行一次續期,續期很簡單可以交給 crontab進行完成,執行:

cat >/root/renew-ssl.sh<<EOF
#!/bin/bash
mkdir -p /網站目錄完整路徑/.well-known/acme-challenge
/root/letsencrypt/letsencrypt-auto --renew-by-default certonly --email 郵箱 -d 域名 --webroot -w /網站目錄完整路徑 --agree-tos
/etc/init.d/nginx reload
EOF
chmod +x /root/renew-ssl.sh

注意要修改上面letsencrypt-auto的路徑爲你自己的,並且裏面的郵箱和域名也要修改。
再crontab裏添加上:0 3 */60 * * /root/renew-ssl.sh 具體 crontab教程點擊查看

2015.12.13更新
官網更新了參數,對本文進行了部分參數的調整。原-a webroot --webroot-path=/網站目錄完整路徑替換爲--webroot -w;--renew替換爲--renew-by-default;增加--agree-tos參數。

同時這裏提醒一下如果設置了http 301跳到https的用戶,再續期前還需要在nginx設置如下:
80端口的虛擬主機上需要添加上,不加的話會無法驗證的

location /.well-known/ {
add_header Content-Type 'text/plain;';
root /網站目錄完整路徑;
}

附完整的nginx下301 http跳到https的配置:


server
{
listen 80;
server_name www.vpser.net;
location /.well-known/ {
add_header Content-Type 'text/plain;';
root /網站目錄完整路徑;
}
location / {
return 301 https://www.vpser.net$request_uri;
}
}

目前就先說這些,有問題可以在本文章下部留言或到 VPS論壇發帖。


原文出處:免費SSL安全證書Let's Encrypt安裝使用教程(附Nginx/Apache配置) - 神馬文庫
冷日
(冷日)
Webmaster
  • 註冊日: 2008/2/19
  • 來自:
  • 發表數: 15766
[轉貼]使用 Certbot 自動更新 Let's Encrypt 憑證

SSL For Free 是一個可以申請免費 SSL 憑證的網站,只需要準備自己的網域名稱就可以申請為期三個月的免費 SSL 憑證,小小的缺點是憑證過期後需要重新申請憑證,並且更換伺服器的舊憑證。而 Certbot 是一個可以簡化申請流程,又可以在憑證過期之前自動更新憑證的超方便工具。


透過 certbot.eff.org 快速安裝

Certbot 官方網站 很貼心的做了一個快速指引,只需要選擇你現在使用的 OS 與 HTTP Server,就會列出安裝指令讓你直接複製貼上輕鬆安裝,不過比較新一點版本的 OS 可能還不支援。


選擇好 OS 與 HTTP Server 後,就一步一步複製指令開始安裝吧!本文以 Ubuntu 16.04 + Apache HTTP Server 實作。


# 安裝軟體管理套件
sudo apt-get install -y software-properties-common
# 加入 certbot ppa repository,並透過 apt-get update 取得套件資訊
sudo add-apt-repository ppa:certbot/certbot
sudo apt-get update
# 安裝 certbot for apache
sudo apt-get install -y python-certbot-apache
# 開始進行 Apache 的憑證安裝
sudo certbot --apache


當輸入到 sudo certbot –apache 時,系統會進入對談式的安裝程序,Certbot 會掃描 HTTP Server 的設定,根據掃描結果列出主機上所擁有的網域,並且詢問要為哪些網域安裝憑證。可以同時選擇多個網域,每個網域以空白或是逗號分隔。如果直接 Enter,就會替所有網域都安裝憑證。


Saving debug log to /var/log/letsencrypt/letsencrypt.log
Plugins selected: Authenticator apache, Installer apache
Which names would you like to activate HTTPS for?
-------------------------------------------------------------------------------
1: caloskao.org
2: blog.caloskao.org
3: www.caloskao.org
4: example.caloskao.org
-------------------------------------------------------------------------------
Select the appropriate numbers separated by commas and/or spaces, or leave input
blank to select all options shown (Enter 'c' to cancel):


選擇安裝網域後,接下來 Certbot 會複製原始設定檔並加入 SSL 相關設定後,同時幫你啟用新的設定檔。


Obtaining a new certificate
Performing the following challenges:
tls-sni-01 challenge caloskao.org
Waiting for verification...
Cleaning up challenges
Created an SSL vhost at /etc/apache2/sites-available/caloskao.org-le-ssl.conf
Deploying Certificate for caloskao.org to VirtualHost /etc/apache2/sites-available/caloskao.org-le-ssl.conf
Enabling available site: /etc/apache2/sites-available/caloskao.org-le-ssl.conf


第二個問題是要不要將所有的 HTTP Request 全部重導向到 HTTPS,建議如果沒有特殊需求,就選擇 2 全部都轉過去吧。


Please choose whether or not to redirect HTTP traffic to HTTPS, removing HTTP access.
-------------------------------------------------------------------------------
1: No redirect - Make no further changes to the webserver configuration.
2: Redirect - Make all requests redirect to secure HTTPS access. Choose this for
new sites, or if you're confident your site works on HTTPS. You can undo this
change by editing your web server's configuration.
-------------------------------------------------------------------------------
Select the appropriate number [1-2] then [enter] (press 'c' to cancel):


最後就是恭喜你設定完成,現在你可以使用 HTTPS 開啟你的網站試試看。並且顯示憑證檔案的系統路徑以及逾期時間。


-------------------------------------------------------------------------------
Congratulations! You have successfully enabled https://caloskao.org
You should test your configuration at:
https://www.ssllabs.com/ssltest/analyze.html?d=caloskao.org
-------------------------------------------------------------------------------
IMPORTANT NOTES:
- Congratulations! Your certificate and chain have been saved at:
/etc/letsencrypt/live/caloskao.org/fullchain.pem
Your key file has been saved at:
/etc/letsencrypt/live/caloskao.org/privkey.pem
Your cert will expire on 2018-03-22. To obtain a new or tweaked
version of this certificate in the future, simply run certbot again
with the "certonly" option. To non-interactively renew *all* of
your certificates, run "certbot renew"
- If you like Certbot, please consider supporting our work by:
Donating to ISRG / Let's Encrypt: https://letsencrypt.org/donate
Donating to EFF: https://eff.org/donate-le


安裝後的確認工作

前面的訊息同時也提醒你可以利用 SSL Labs 的 SSL Test 測試你的網站是否正確安裝了 SSL 憑證,用瀏覽器開啟 Certbot 提供的網址,就可以看到測試結果。


Certbot 預設會啟動自動更新,輸入 sudo systemctl status certbot.timer 確認自動更新有沒有正常執行:


sudo systemctl status certbot.timer
● certbot.timer - Run certbot twice daily
Loaded: loaded (/lib/systemd/system/certbot.timer; enabled; vendor preset: enabled)
Active: active (waiting) since Thu 2018-06-21 09:02:48 CST; 6 days ago
Jun 21 09:02:48 apps-csie systemd[1]: Started Run certbot twice daily.


你可以透過 sudo certbot renew --dry-run 指令測試 Cerbot 是否能夠正常執行憑證更新。移除參數 --dry-run 就會正常執行,會覆蓋舊憑證。


sudo certbot renew --dry-run
Saving debug log to /var/log/letsencrypt/letsencrypt.log
-------------------------------------------------------------------------------
Processing /etc/letsencrypt/renewal/caloskao.org.conf
-------------------------------------------------------------------------------
Cert not due for renewal, but simulating renewal for dry run
Plugins selected: Authenticator apache, Installer None
Renewing an existing certificate
Performing the following challenges:
tls-sni-01 challenge for caloskao.org
Waiting for verification...
Cleaning up challenges
-------------------------------------------------------------------------------
new certificate deployed without reload, fullchain is
/etc/letsencrypt/live/caloskao.org/fullchain.pem
-------------------------------------------------------------------------------
-------------------------------------------------------------------------------
** DRY RUN: simulating 'certbot renew' close to cert expiry
** (The test certificates below have not been saved.)
Congratulations, all renewals succeeded. The following certs have been renewed:
/etc/letsencrypt/live/caloskao.org/fullchain.pem (success)
** DRY RUN: simulating 'certbot renew' close to cert expiry
** (The test certificates above have not been saved.)
-------------------------------------------------------------------------------


原文出處:[Ubuntu] 使用 Certbot 自動更新 Let's Encrypt 憑證 | Calos's Blog
冷日
(冷日)
Webmaster
  • 註冊日: 2008/2/19
  • 來自:
  • 發表數: 15766
[轉貼]利用 certbot 自動更新 Let's Encrypt 憑證

【SSL 憑證】利用 certbot 自動更新 Let's Encrypt 憑證


動機


之前文章 【SSL 憑證】利用 sslforfree 協助申請 Let's Encrypt
nobodyzxc 所回應的感謝詞,讓我想起之前我憑證再度過期實作的處理

之前用sslforfree很方便,但是卻不能每三個月幫我置換一次憑證
基於懶人心態,所以這次使用了Certbot作為自動處理憑證的方式


過程


因為是回憶,所以先開台centos6 docker來做測試
如果直接安裝在本機的就可以略過這段
但是我是真的蠻建議在測試的時候使用docker的
好吃不黏手


[root@localhost ~]# docker pull centos:6
[root@localhost ~]# docker images
REPOSITORY TAG IMAGE ID CREATED SIZE
docker.io/centos 6 7ea307891843 6 days ago 194.3 MB
[root@localhost ~]# docker run -idt -p 80:80 7ea
1a02142ca151f936a456f7150bd2657c4f7f06cfa8b1c230f8928dbe58015567
[root@localhost ~]# docker attach 1a0
[root@1a02142ca151 /]#
然後安裝apache進去


[root@1a02142ca151 /]# yum install -y httpd wget
[root@1a02142ca151 /]# service httpd start
Starting httpd: httpd: Could not reliably determine the server's fully qualified domain name, using 172.17.0.2 for ServerName
[ OK ]
開瀏覽器確認一下有沒有服務

到這邊都正常,那麼就可以導一個zone過來用了
我是用godaddy直接處理的,這邊就不秀了

接著前往 Certbot 官方 選擇自己的web service

然後安裝他


[root@1a02142ca151 /]# wget https://dl.eff.org/certbot-auto
[root@1a02142ca151 /]# chmod a+x certbot-auto
[root@1a02142ca151 /]# certbot-auto --apache
填資料時間


Enter email address (used for urgent renewal and security notices) (Enter 'c' to
cancel): g23988@gmail.com
-------------------------------------------------------------------------------
Please read the Terms of Service at
https://letsencrypt.org/documents/LE-SA-v1.1.1-August-1-2016.pdf. You must agree
in order to register with the ACME server at
https://acme-v01.api.letsencrypt.org/directory
-------------------------------------------------------------------------------
(A)gree/(C)ancel: A
-------------------------------------------------------------------------------
Would you be willing to share your email address with the Electronic Frontier
Foundation, a founding partner of the Let's Encrypt project and the non-profit
organization that develops Certbot? We'd like to send you email about EFF and
our work to encrypt the web, protect its users and defend digital rights.
-------------------------------------------------------------------------------
(Y)es/(N)o: Y
No names were found in your configuration files. Please enter in your domain
name(s) (comma and/or space separated) (Enter 'c' to cancel): test.mydomain.com
(note: conf files with multiple vhosts are not yet supported)
-------------------------------------------------------------------------------
1: ssl.conf | | HTTPS | Enabled
-------------------------------------------------------------------------------
Press 1 [enter] to confirm the selection (press 'c' to cancel): 1
然後劈劈啪啪就裝好了

超爽,什麼都不用自己用XD

接著設定一下排程讓他自己更新


[root@1a02142ca151 /]# vi /etc/crontab
0 23 * * * root /certbot-auto renew
啊哈,輕鬆愉快

怕有意外的話可以自己手動跑跑看


root@raspberrypi:/opt# /certbot-auto renew
Saving debug log to /var/log/letsencrypt/letsencrypt.log
-------------------------------------------------------------------------------
Processing /etc/letsencrypt/renewal/mydomain.com.conf
-------------------------------------------------------------------------------
Cert not yet due for renewal
The following certs are not due for renewal yet:
/etc/letsencrypt/live/mydomain.com/fullchain.pem (skipped)
No renewals were attempted.
不用自己手動來了,除非你想練習拉 XD

畢竟正式工作內容還是得自己手動換

原文出處:【SSL 憑證】利用 certbot 自動更新 Let's Encrypt 憑證
冷日
(冷日)
Webmaster
  • 註冊日: 2008/2/19
  • 來自:
  • 發表數: 15766
[轉貼]NGINX 使用 Let’s Encrypt 免費 SSL 憑證設定 HTTPS 安全加密網頁教學

NGINX 使用 Let’s Encrypt 免費 SSL 憑證設定 HTTPS 安全加密網頁教學

本文介紹如何在 nginx 伺服器上使用免費的 Let’s Encrypt 憑證,提供 HTTPS 的安全加密網頁。

Let’s Encrypt 是一家新的證書頒發機構(Certificate Authority,簡稱 CA),其提供免費的 TLS/SSL 憑證再配合 Certbot 這個自動化工具,讓一般的網站可以很容易地使用 HTTPS 的安全加密網頁,設定很簡單,憑證的更新也可以自動處理。

以下我以 Ubuntu Linux 14.04 的系統為例,示範 nginx 伺服器使用 Let’s Encrypt 憑證設定 HTTPS 安全加密網頁的方法。

下載 Let’s Encrypt SSL 憑證

Let’s Encrypt 的憑證可以透過官方建議的 Certbot 自動化工具來下載,以下是操作步驟。

Step 1
從 Certbot 官方網站下載 certbot-auto 指令稿,並設定其執行權限:


wget https://dl.eff.org/certbot-auto
chmod a+x certbot-auto

certbot-auto 要放在哪裡都可以,建議一開始就找一個適合的地方放好,例如建立一個 /opt/letsencrypt 目錄,把 certbot-auto 放在這裡:


mkdir /opt/letsencrypt
mv certbot-auto /opt/letsencrypt/

Step 2
執行 certbot-auto,讓它自動安裝所有相依套件:

/opt/letsencrypt/certbot-auto

執行 certbot-auto 時,會需要輸入密碼取得 root 權限。

Step 3
安裝完成所有需要的系統套件後,接著我們要透過 webroot 的方式,使用既有的 nginx 網頁伺服器來向 Let’s Encrypt 取得憑證,而在認證的過程會需要在網頁根目錄中建立一個 .well-known/acme-challenge/ 目錄,讓 Let’s Encrypt 的伺服器來讀取其中的內容。

一般的 nginx 伺服器通常會設定把句點開頭的隱藏檔案都擋掉,遇到這樣的狀況就會無法進行認證,這時候可以再加一小段設定,讓 .well-known/acme-challenge/ 目錄可以被正常讀取:


 ^~ /.well-known/acme-challenge/ {
# the usual settings
}
~ /\. {
deny all;
}

Step 4
使用 certonly 功能下載憑證:

/opt/letsencrypt/certbot-auto certonly -d gtwang.org

Step 5
輸入自己的 Email 信箱。

secure-nginx-with-lets-encrypt-ssl-certificate-on-ubuntu-and-debian-1
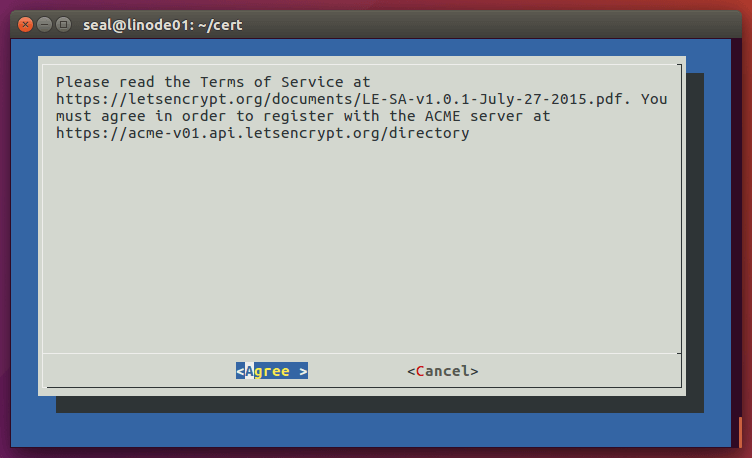
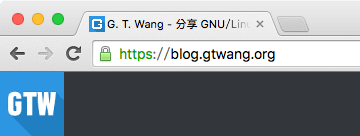
https://blog.gtwang.org/wp-content/uploads/2016/05/secure-nginx-with-lets-encrypt-ssl-certificate-on-ubuntu-and-debian-1-300x183.png 300w" sizes="(max-width: 752px) 100vw, 752px" />

Step 6
閱讀使用條款,選擇「Agree」繼續。

Step 7
下載完成後,會出現類似這樣的成功訊息。


IMPORTANT NOTES:
- Congratulations! Your certificate and chain have been saved at
/etc/letsencrypt/live/blog.gtwang.org/fullchain.pem. Your cert will
expire on 2016-08-13. To obtain a new version of the certificate in
the future, simply run Certbot again.
- If you like Certbot, please consider supporting our work by:
Donating to ISRG / Let's Encrypt: https://letsencrypt.org/donate
Donating to EFF: https://eff.org/donate-le

這樣就成功取得 Let’s Encrypt 的憑證了,而 nginx 用的憑證就儲存在 /etc/letsencrypt/live/blog.gtwang.org/ 目錄之下,其中 fullchain.pem 就是 nginx 需要憑證,而 privkey.pem 則是需要保護好的私鑰,關於憑證檔案的詳細說明,請參考 Certbot 的說明文件

Certbot 還有提供另外一個 standalone 的方式來向 Let’s Encrypt 取得憑證,這種方式是由 Certbot 建立一個獨立的網頁伺服器,提供 Let’s Encrypt 讀取驗證用的資料,不過這樣的做法需要綁定 80443 連接埠,所以通常還會需要暫停既有的網頁伺服器,對於一般的網站而言,會造成網站有幾秒鐘的斷線現象,所以我個人不喜歡這樣的方式。

接下來要設定 nginx 伺服器,使用這個新憑證來提供 HTTPS 的安全加密網頁。

設定 nginx 伺服器使用 SSL 憑證

要讓 nginx 啟用 HTTPS 安全加密網頁,只要加上 SSL 相關的幾行設定即可,其餘的設定保持不變,以下是我個人使用的 nginx 伺服器設定:


server {
# 傾聽 HTTPS 標準埠號 443
listen 443;
# 同時啟用 IPv6 的 HTTPS 安全加密網頁
listen [::]:443;
server_name blog.gtwang.org;
root /var/www/blog.gtwang.org/;
index index.php index.html index.htm;
# 啟用 SSL
on;
# 設定 SSL 憑證
ssl_certificate /etc/letsencrypt/live/blog.gtwang.org/fullchain.pem;
ssl_certificate_key /etc/letsencrypt/live/blog.gtwang.org/privkey.pem;
# 其他 SSL 選項
ssl_session_timeout 5m;
# omit SSLv3 because of POODLE (CVE-2014-3566)
'ECDHE-ECDSA-CHACHA20-POLY1305:ECDHE-RSA-CHACHA20-POLY1305:ECDHE-ECDSA-AES128-GCM-SHA256:ECDHE-RSA-AES128-GCM-SHA256:ECDHE-ECDSA-AES256-GCM-SHA384:ECDHE-RSA-AES256-GCM-SHA384:DHE-RSA-AES128-GCM-SHA256:DHE-RSA-AES256-GCM-SHA384:ECDHE-ECDSA-AES128-SHA256:ECDHE-RSA-AES128-SHA256:ECDHE-ECDSA-AES128-SHA:ECDHE-RSA-AES256-SHA384:ECDHE-RSA-AES128-SHA:ECDHE-ECDSA-AES256-SHA384:ECDHE-ECDSA-AES256-SHA:ECDHE-RSA-AES256-SHA:DHE-RSA-AES128-SHA256:DHE-RSA-AES128-SHA:DHE-RSA-AES256-SHA256:DHE-RSA-AES256-SHA:ECDHE-ECDSA-DES-CBC3-SHA:ECDHE-RSA-DES-CBC3-SHA:EDH-RSA-DES-CBC3-SHA:AES128-GCM-SHA256:AES256-GCM-SHA384:AES128-SHA256:AES256-SHA256:AES128-SHA:AES256-SHA:DES-CBC3-SHA:!DSS';
on;
# ...
}

ssl_protocols 的部分記得要 把 SSLv3 拿掉,避免 POODLE 攻擊(CVE-2014-3566)。

如果不想自己寫 Nginx 的設定檔,也可以使用 Mozilla 所提供的 Mozilla SSL Configuration Generator 設定檔產生工具。

設定好之後,檢查一下設定檔是否正確:

service nginx configtest

確認無誤之後,重新載入設定檔:

service nginx reload

這樣就完成 nginx 伺服器的設定了,接著就可以開啟 HTTPS 加密的網址來測試了,正常來說,使用 Google Chrome 瀏覽器開啟自己主機的 HTTPS 加密網址,應該就會顯示一個綠色的鎖頭,這樣就代表我們安裝的 SSL 憑證是有效的。

如果想要檢視憑證的內容,可以點擊網址列的綠色鎖頭,裡面可以看到憑證的詳細資料。

另外也可以使用 Qualys 的 SSL 伺服器測試工具來檢測。

自動更新 SSL 憑證

Let’s Encrypt 的憑證使用期限只有三個月,在憑證到期前的一個月可以使用 certbot-auto 來更新憑證,在實際更新之前我們可以加入 --dry-run 參數,先進行測試:

/opt/letsencrypt/certbot-auto renew --dry-run

若測試沒問題,就可以使用正式指令來更新:

/opt/letsencrypt/certbot-auto renew --quiet --no-self-upgrade

而為了方便起見,可以將這個更新指令寫在
/opt/letsencrypt/renew.sh 指令稿中:


#!/bin/sh
/opt/letsencrypt/certbot-auto renew

這裡我又加上一個 --post-hook 的設定,讓憑證更新完後,可以自動重新載入 nginx 伺服器的設定,讓憑證生效。

接著把這個 /opt/letsencrypt/renew.sh 指令稿寫進 crontab 中:


# m h  dom mon dow   command
/opt/letsencrypt/renew.sh

官方的建議是這個指令可以一天執行兩次,讓伺服器的憑證隨時保持在最新的狀態,這裡我是設定讓伺服器每週日凌晨兩點半進行憑證的檢查與更新,Certbot 只有在憑證到期前一個月才會進行更新,如果憑證尚未到期,就不會更新。

參考資料: TecmintDigitalOceanDigitalOceanNGINX Blogletsencrypt.tw


原文出處:NGINX 使用 Let’s Encrypt 免費 SSL 憑證設定 HTTPS 安全加密網頁教學 - G. T. Wang
前一個主題 | 下一個主題 | 頁首 | | |


Powered by XOOPS 2.0 © 2001-2008 The XOOPS Project|